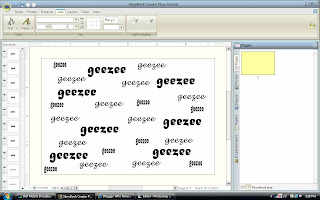
Beginning with a new project, Select the Text ribbon. Clicking on the drop-down arrow above insert and below text gives you a place text on page option. You will create a text box to work with.
 Inside this box you will click again to edit. This activates your text options. These include a black box with a drop down arrow next to it. This will be important in a minute. First choose the font and size you think you might like. Adjusting these to your liking before you copy and paste them will make less work later, but can be changed at any time.
 When you have the text as you think you want it, right click on the text itself and choose copy. When you right click and paste the copy will always appear in the center of the screen. This presents you with options. We like options, don't we? You may choose to paste a few in succession and move the top one to a spot of your choosing. I personally pasted one, placed it and then repeated until I got something I liked. (side note: I have no concept of random placement. I like linear and perfect. As though I could ever attain it.LOL).
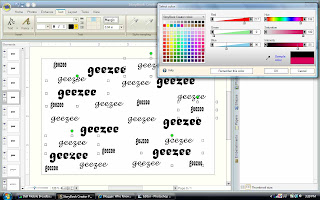
Create another text box with another font. Repeat the copy and paste process. Notice that all the text is black at this point. The program defaults to this color. Now comes the black box with the drop-down menu you found on the text tab earlier.
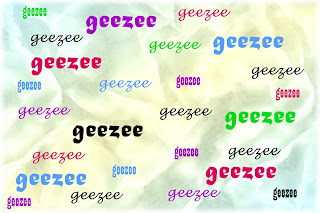
Clicking on the arrow gives you this color chart. Notice the black and pink bar on the lower right side? The top portion indicates the current color, the bottom changes color when you select one from the chart by clicking on it. This gives you a visual of what you will be seeing when you select ok. Now that you know how to change the color of the text, you can choose random parts of the page of text (holding the shift button each time you select another makes them all active at once) and color them.
 Doing all the text boxes before coloring gives you the chance to choose different words, fonts, sizes, and placement on the page to be changed at once. I like that for seeing a little more of the big picture or final product at once.
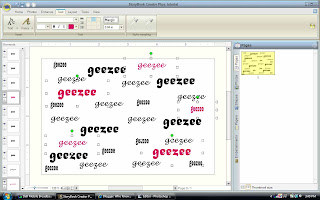 Continue selecting around the page as you like. Remember if you want one item changed, just select that one item alone and do with it what you want. Very user friendly. Remember the undo button at the top.

Clicking on the arrow gives you this color chart. Notice the black and pink bar on the lower right side? The top portion indicates the current color, the bottom changes color when you select one from the chart by clicking on it. This gives you a visual of what you will be seeing when you select ok. Now that you know how to change the color of the text, you can choose random parts of the page of text (holding the shift button each time you select another makes them all active at once) and color them.
 Doing all the text boxes before coloring gives you the chance to choose different words, fonts, sizes, and placement on the page to be changed at once. I like that for seeing a little more of the big picture or final product at once.
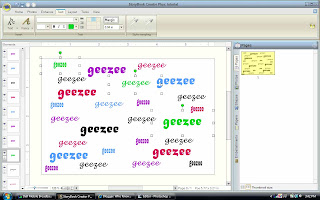
 Continue selecting around the page as you like. Remember if you want one item changed, just select that one item alone and do with it what you want. Very user friendly. Remember the undo button at the top.
I went ahead and played with the background a bit. Never claimed to be a designer, just a curious, bossy sort.
Once again, any input is appreciated. I have helped someone with the mask post over the phone and if anyone else feels that the instructions could be more complete or need something, let me know. I realize I ramble and by the time I publish my post I am absolutely convinced that it makes no sense.
g
After I read your post, I read this one: http://thedailydigi.com/the-long-and-windingpath-part-1/ I haven't looked at the tutorials, but they are probably good considering the source. How ironic! -Sunny
ReplyDeleteBut CAN this be achieved with SBC or MM (text paths)?? If so, I'd be a very happy camper.
ReplyDeleteSamantha
Thanks for the tut on word art papers....I was wondering if we might be able to save as a .png file & use as an overlay??